- 1 large bag or 1-2 large bundles of kale, de-stemmed and broken into pieces
- 1 Tbsp coconut oil or olive oil
- 1-2 Tbsp agave
- Himalayan salt
- cayenne pepper
- 1-4 Tbsp nutritional yeast
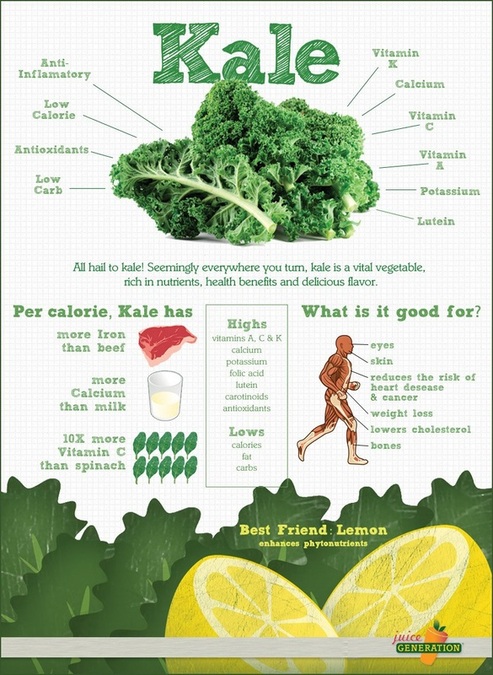
Kale! This powerful leafy green superfood is quickly finding it's way into the homes of many people who are trying to get healthy. And for good reason! It's packed with vitamins K, A and C, has more calcium than milk, more iron than beef, is loaded with antioxidants and is anti-inflammatory. If you haven't tried kale yet, what are you waiting for!? :) Scott and I both put a big handful of kale in our green smoothies every morning, but there are a few other ways to eat this super charged plant. One of those ways is kale chips! Kale chips are great for people like me, who like to have food to pick at. I can get stuck mindlessly eating a bag of chips, but kale chips help erase the guilt! And they're super easy to make. You can use either your oven or a dehydrator. I like to use my dehydrator because I can control the temperature better, and keep the temp low enough so that they're still considered a raw food. By keeping them raw, more of the enzymes and nutrients are still intact. 
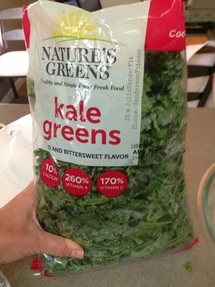
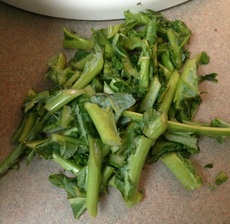
You can play around with the different spices as you go, but this recipe for kale chips is one of my favorites so far. Today I started with a BIG bag of kale that I got from BJ's Wholesale. I know, not organic, but the convenience factor won me over because they were already broken into small pieces. If you do decide to use fresh kale, you'll want to make sure you wash it really well, remove the stems, and break it into small pieces. If you're using kale from a bag, be sure to go through and remove the stems.
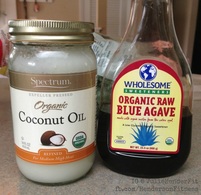
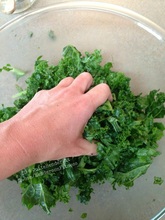
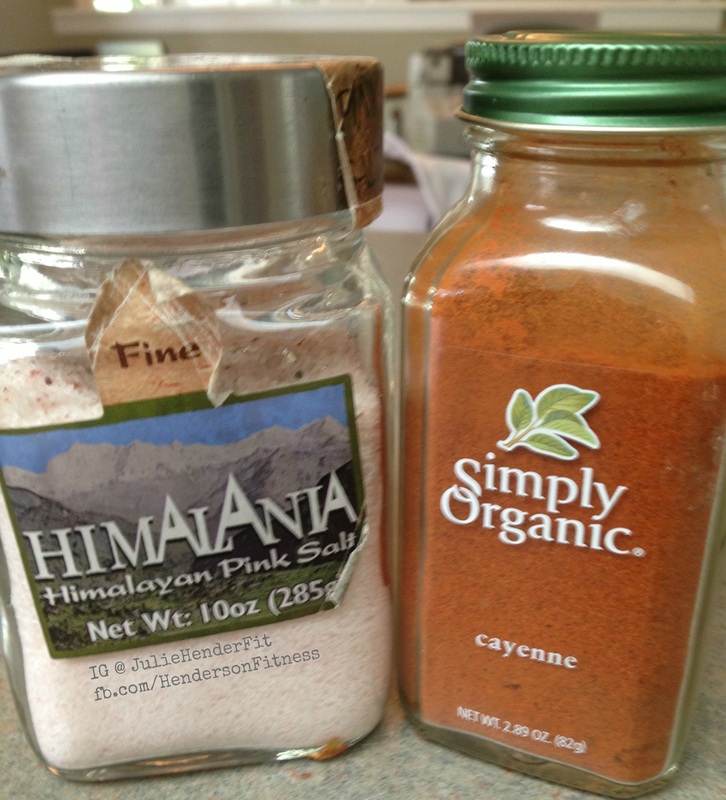
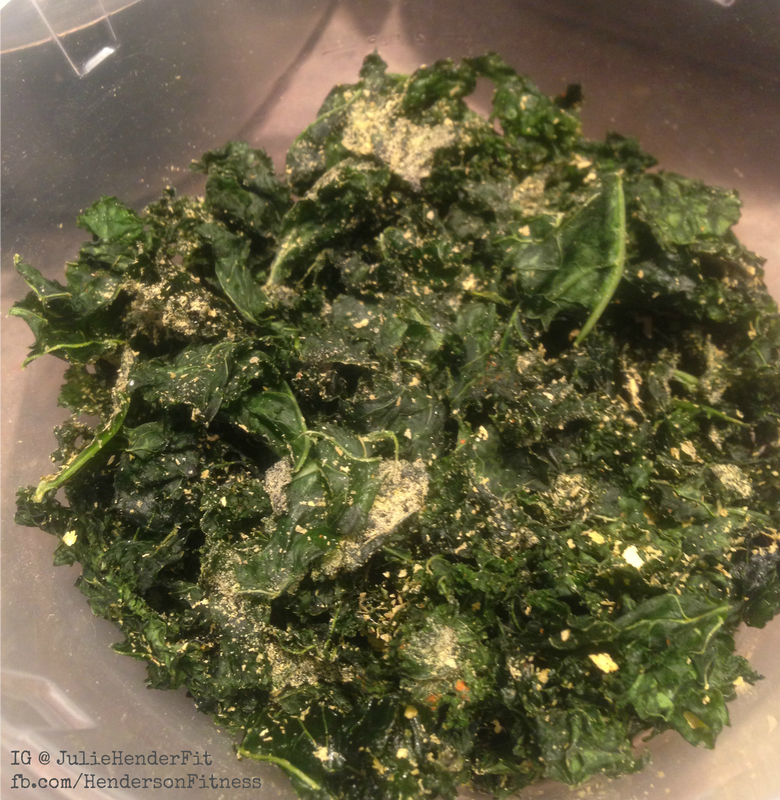
Once you've washed your kale, removed the stems and broken it into pieces, put it in a large bowl and add the oil and agave. I usually use olive oil, but today the only oil I had in my house was coconut oil and it worked just as well, I just had to warm it a bit first so it was a softer consistency. Mix together one Tbsp oil to one to two Tbsp's agave, depending on how sweet you want them. Massage the kale with the oil and agave in a large bowl, making sure the mixture is coating all the kale. (Massaging kale is also great when using kale for salads, too!) Sprinkle with sea salt and cayenne. Be careful with the cayenne, the kale will shrink when it dehydrates, the cayenne will NOT!
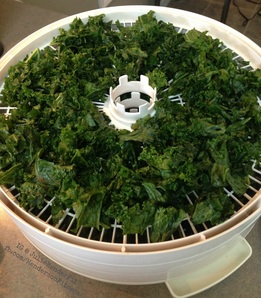
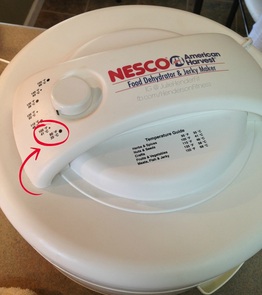
Once you have all the kale coated it's ready to go into the dehydrator. Spread out the kale evenly, then adjust your temperature so it's below 118 F. This will ensure that they're still raw. I put my temperature gauge somewhere between the first two settings. It will take a few hours for them to dry out. You'll be able to tell when they're ready because they will be crispy and won't be flexible. I just use a cheap dehydrator that I got years ago. It works well enough. Sometimes the food on the top shelves gets done a bit sooner than the bottom shelves, so I just remove the top shelves once they're done and keep the bottom ones on until they're ready. 
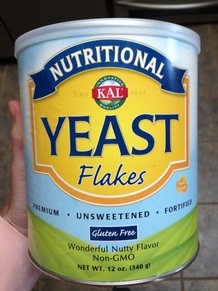
Once they're done they're ready to eat! Store them in an airtight container in the fridge. Just before I eat them I sprinkle them with nutritional yeast.
0 Comments
Rhubarb is a great source of calcium, vitamin K, lutein (which helps with your skin and eyes) and antioxidants, and also helps lower your cholesterol. We have so much of it growing in our backyard, and with all those health benefits you'd think we'd eat it all the time, but we really don't. Why? There are so many great rhubarb recipes out there, but unfortunately, because rhubarb is so sour, they all contain a ton of added sugar. Until now. :) This weekend it was hot and sunny out. Perfect weather for me to make my homemade, sugar-free lemonade (which I should really post a recipe for!) and then it hit me... I could juice rhubarb! So I grabbed a couple stalks and headed to the kitchen! I juiced approximately two BIG stalks and ended up with a full cup of rhubarb juice. (For those of you who juice regularly, you know that's a lot of juice!) Since rhubarb is almost all water, it had a very high juice yield, but because of the fiber in the stalks, it really clogged up my juicer, almost like wheatgrass does. I used my Kuvings masticating juicer. I'd be interested to see how it juices in a centrifugal juicer. Then I juiced some fresh stevia leaves, fresh mint leaves, and a pint of strawberries, leaving the tops on. This juiced much thicker than the rhubarb and almost pulpy. After that I just added it to a bunch of ice and topped it off with club soda, but you could also use water (which is what I do for my lemonade). And that's it! It was so nice and refreshing. You could also play around with it and add frozen blueberries, peaches or other fruit, and replace the fresh Stevia with a different sweetener, or omit it all together.
If you make this, let me know in the comments below how you liked it and if you made any adjustments to the recipe! Maybe you've heard of it, maybe you haven't, but did you know you can make your own seitan at home for WAY less than buying it pre-packaged?
If you haven't heard of it, seitan is a high protein, low carb, low fat meat substitute made from vital wheat gluten. It can be found in the refrigerated section of health food stores. A typical 8 oz. package of seitan costs around $5, but you can easily make your own for a fraction of that. Today we're using Bob's Red Mill vital wheat gluten flour. One 22 oz. package costs around $5 and will make the equivalent of over $40 of store bought seitan. That's a HUGE savings! And it's so easy to make. To make your own seitan all you need to do is mix some spices in with the vital wheat gluten flour (today we used garlic powder and onion powder), add water, mix, cut into small pieces and boil. That's it! It really is that simple! The back of the bag will give you the exact measurements for water and flour. Enjoy! :) You've been working out and hitting the pavement and making great strides. You're getting great results and have even ran a 5k or two (or more!). So what are you supposed to do will all those race bibs you're collecting? You worked really hard for them and each holds a special memory so you don't want to throw them out... but you also don't want them cluttering up your desk drawer anymore. Here's a quick, easy and inexpensive way to make a Bibfolio to store them all! All you need is a flexible, plastic folder, 2 key rings, scissors, a hole punch, a ruler and some stickers to bling it out. First, open the folder and lay it flat. You'll want to cut along the center to remove the middle binder so you have a flat front and back, then cut to remove the inside pockets. Once you have two flat pieces, you'll want to trace an 8" x 10 " rectangle on each. Cut out each rectangle and slightly round all four corners. These will be the front and back of your bibfolio. Place one of your race bibs on either the front or back to line it up for the holes, leaving a little space on each side. Punch holes where your race bib holes are. Line up the front and back pieces so the holes match on each side. Once you have the holes punched in both the front and back, decorate your bibfolio with stickers (I like to decorate the inside and outside), attach the key rings, and add your race bibs! Most race bibs are the same size and have their holes in the same place. So far the only ones I have found that are different are Warrior Dash bibs. They are a little wider and the holes are farther apart. I just take a hole punch and add extra holes in the Warrior Dash bibs so they line up and fit with the other ones.
|
JulieFormer esthetician & LMT turned #GIRLBOSS, vegan food & fitness, travel, beauty, FUN!! Veg-curious friendly ☀️👙🌴✌🏻️ Archives
September 2015
Categories
All
|